

How to use drill-ins
1
Choose a driver
In a driver table, hover over a driver row that can be expanded. A caret appears next to eligible rows.
2
Open inputs
Click the caret next to the driver name, or right-click the driver and select Show inputs. You can also press
⌘⏎ (Ctrl+Enter on Windows) on the selected row.3
Review the inputs
The driver’s inputs appear as nested child rows. Drilling into dimensional or database-backed drivers expands segment and object sub-rows, and you can keep drilling into eligible child rows.
4
Close inputs
Click the caret again, right-click the driver and select Hide inputs, or press
⌘⏎ (Ctrl+Enter on Windows) again.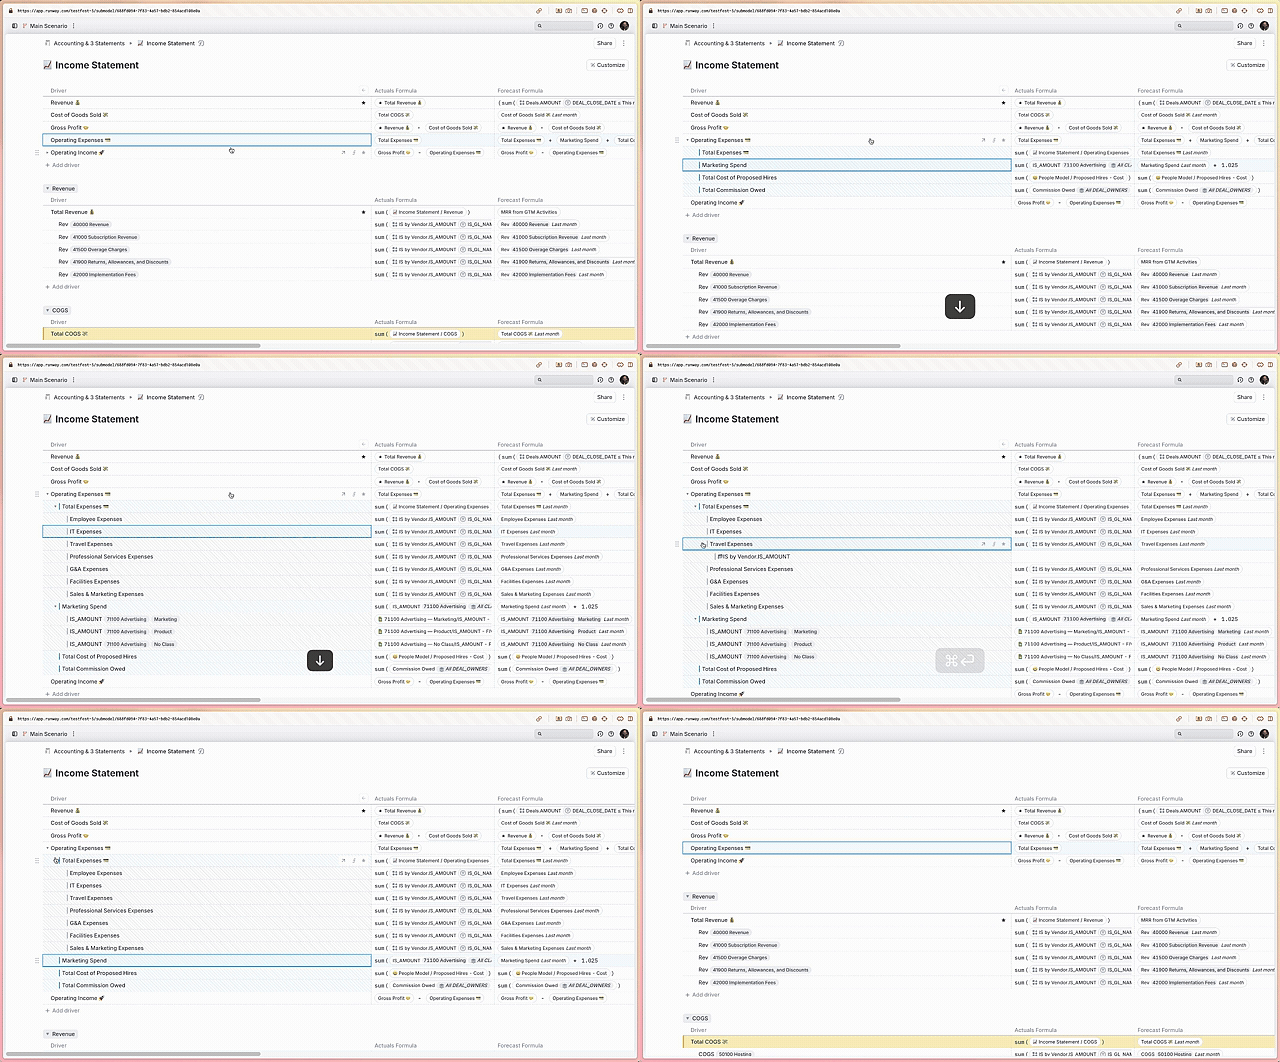
Drill-in access
Drill-ins respect the block-level Can drill in access rule. For current access rules, see Permissions and Roles and access.Open detail view
Use Open detail view or press⌘⇧⏎ (Ctrl+Shift+Enter on Windows) to open the details pane for the selected row. The details pane shows Overview, Used By, and Plans tabs when available. See Driver details pane for more detail.